Configuring EYouth - Open edX Platform
The following sections provide information about Open edX Platform configuration options.
-
Enable Course Certificates in Studio and the LMS
To enable certificates, modify the lms.env.yml and cms.env.yml files, which are located one level above the edx-platform directory:
~/.local/share/tutor/env/apps/openedx/config/lms.env.yml~/.local/share/tutor/env/apps/openedx/config/cms.env.ymlIn the lms.env.yml and cms.env.yml files, set the value of CERTIFICATES_HTML_VIEW within the FEATURES object to true.
 "FEATURES": {
 ...
 'CERTIFICATES_HTML_VIEW': true,
 ...
 }
Save the lms.env.yml and cms.env.yml files.
-
Configure Course Certificates for EYouth Open edX Instance
Access the LMS Django Administration website for your instance of Open edX. To do this, go to
https://[host name of your Open edX instance]/admin.
For example, this might behttps://experience.eyouthlearning.com/admin.Under Site Administration > Certificates, add an HTML View Configuration, and select Enabled.
Set the following certificates-related parameters for your Open edX instance.
- platform_name
- company_about_url
- company_privacy_url
- company_tos_url
- company_verified_certificate_url
- logo_src
- logo_url
For each course mode for which you want to offer certificates (such as “honor” or “verified”), define these parameters.
- certificate_type
- certificate_title
- document_body_class_append
Make sure the mode name matches your course mode name exactly. An example follows.
{
"default": {
    "accomplishment_class_append": "accomplishment-certificate",
    "platform_name": "YourPlatformName",
    "company_about_url":"https://www.YourOrganization.com/about-us",
    "company_privacy_url": "https://www.YourOrganization.com/our-privacy-policy",
    "company_tos_url": "https://www.YourOrganization.com/our-terms-service",
    "company_verified_certificate_url": "https://www.YourOrganization.com/about_verified_certificates",
    "logo_src": "/static/certificates/images/our_logo.svg",
    "logo_url": "www.YourOrganization.com"
},
"honor": {
    "certificate_type": "honor",
    "certificate_title": "Honor Certificate",
    "document_body_class_append": "is-honorcode"
},
"verified": {
    "certificate_type": "verified",
    "certificate_title": "Verified Certificate",
    "document_body_class_append": "is-idverified"
},
"base": {
    "certificate_type": "base",
    "certificate_title": "Certificate of Achievement",
    "document_body_class_append": "is-base"
}
}
Save the configuration parameters.
Restart the Studio and LMS processes to load the updated environment configurations.
-
Customize Certificate Templates For Your Organization
Set up the templates for certificates that your organization will issue. Base templates are included, but you must ensure that they are customized for your organization. For example, you can change the images that appear on certificates for each course mode that your organization supports, as well as fonts and colors that are used on certificates.
Assets for HTML certificates exist in the following locations.
lms/templates/certificates- this folder contains .html files for certificates.- The file
valid.htmlis an example of a certificate file. -
Files with names that start with an underscore, such as
_certificate_footer.html, are partial files that can be referenced in the main certificate .html files. -
lms/static/certificates- subfolders of this folder contain assets used in creating certificates, such as images, fonts, and sass/css files.
-
Enable Automatic Certificate Generation
It is suggested that automatic certificate generation be enabled in order to provide the best experience for learners. Particularly in self-paced courses, your learners might not want to wait until an instructor initiates certificate generation; instead, they would typically expect to be able to download their certificates as soon as they achieve a passing grade. This can be achieved by enabling auto_certificate_generation as described below.
To globally enable this functionality, you must set a Waffle switch:
-
In the LMS Django Administration site for your instance of Open edX, under Django-Waffle > Switches, select Add Switch.
-
Name the switch
certificates.auto_certificate_generation. -
Tick the Active checkbox.
-
Click Save to activate the switch.
Open edX caches the value of this Waffle switch, thus the changed setting may take several minutes to propagate in a large installation.
-
-
Allow Learners to Download Early Certificates:
To allow learners to download early certificates, you modify the Certificates Display Behavior advanced setting in Studio.
1- In Studio, on the Settings menu, select Advanced Settings.
2- On the Advanced Settings page, locate Certificates Display Behavior.
3- In the Certificates Display Behavior field, enter
"early_no_info". Be sure that you include the double quotation marks.4- Select Save Changes.
-
Enable Self-Paced Courses in the Learning Management System
To enable self-paced courses, follow these steps to edit the configurations, using the Django administration console for your Open edX LMS.
1- Log in to the Django administration console for the LMS.
2- In the Self_Paced section, locate Self paced configurations, and then select Add.
3- Select the Enabled and Enable course home page improvements checkboxes.
4- Select Save.
-
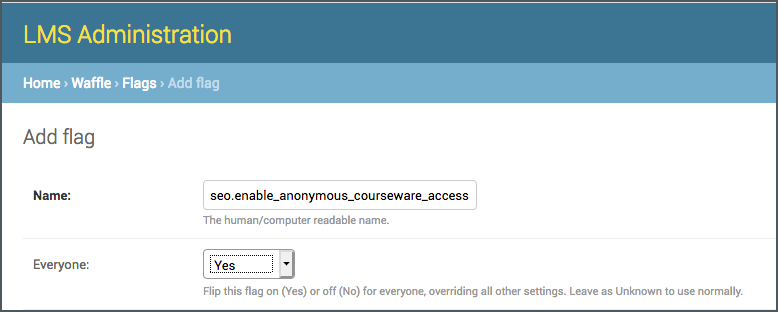
Enable Public Course Content in the Admin
The public course content feature is enabled in the Django LMS Admin with the seo.enable_anonymous_courseware_access waffle flag:
Create a normal waffle flag to enable this flag for all courses.
-
Set Course Content Visibility
View your course in Studio, and navigate to the Advanced Settings page.
Locate the Course Visibility For Unenrolled Learners setting.
By default, this is set to
"private", which ensures that only enrolled learners can access your course content.If you change this to
"public_outline", then your course outline, but not the other course content, will be visible to everyone.If you change this to
"public", then all of your course content, including the course outline, will be visible to everyone.
-
Set Course About Page Visibility
If you want your course to be crawled by Google and other search engines, you should also ensure that your course’s About page is visible, and that it is shown in the course catalog. Without these settings, only people with a link to your course outline or specific content blocks will be able to find your course.
View your course in Studio, and navigate to the Advanced Settings page.
Locate the Course Visibility in Catalog setting and set it to
"both".
-
Enable Discussion Notifications
After you have set up ACE and the third party email client, you enable discussion notifications in the Django administration console for your instance of Open edX.
1- Sign in to the LMS Django administration console for your base URL. For example,
http://{your_URL}/admin.2- On the Site Administration page, locate Site_Configuration.
3- In the Site_Configuration section, next to Site configurations, select Change.
4- On the Change site configuration page, locate the Values field, and then add the following value.
{"enable_forum_notifications":true}5- Select Save.
-
Enable the CDN
After you configure your CDN, follow these steps.
1- Sign in to the Django administration console for your base URL. For example,
http://{your_URL}/admin.2- In the Static_Replace section, next to Asset base url configs, select Add.
3- Select Enabled.
4- Enter the hostname for your CDN provider.
For example, if you were using CloudFront, this would look something like
d37djvu3ytnwxt.cloudfront.net.Be sure not to include the scheme (
http://orhttps://) when you specify the hostname.5- Select Save.
-
Enabling the Weekly Learning Goals Feature
The following waffle flag needs to be enabled:
course_experience.enable_course_goals
-
Stream Live Video Classes in Open edX with Zoom
1- Go to
https://marketplace.zoom.us/then Sign In.2- On the search bar locate "LTI Pro" then click on it.
3- Install the LTI Pro then locate Manage.
4- Click on Configure then click on Create a new credential
5- Copy the LTI key, LTI Secret and LTI URL.
6- On the same page locate "Email or Employee Unique ID Attribute Name" then type
"instructor_email".7- On the same page locate Approved Domains then type
[https://experience.eyouthlearning.com/]and[https://studio.eyouthlearning.com/].8- Log In to Sign in to your Studio
[https://studio.eyouthlearning.com/]9- Go to the Course Outline page.
10- Click on Settings then Advanced Settings.
11- Locate Advanced Module List then add
["lti_consumer"]in the list.12- Locate LTI Passports then type
["zoom:PUT YOUR LTI KEY:PUT YOUR LTI SECRET"].13- Select Save Changes.
14- Select a unit of the course then on Add New Component Section click on Advanced after that click on LTI Consumer then on Edit.
15- On the LTI Application Information type EYouth Live Session.
16- On the LTI ID type zoom.
17- On the LTI URL put Your LTI URL.
18- On the Custom Parameters type
["instructor_email={StafUserName}@{YourDomain.com}"].19- Select Save.

-
Register the Open edX Instance with Google
The following instructions describe how to configure Google as a third party authentication provider so that users can use Google accounts (which includes Google Apps accounts) to sign in. These are based on the official Google instructions.
-
Obtain credentials to access the Google API. To do this, follow the official Google instructions to go to the Google Developers Console, create a new project, and enable the Google+ API service.
-
In the Google Developers Console, select API Manager, and then select OAuth Consent Screen.
-
For Product name shown to users enter the name of your Open edX instance (for example, “Example Academy Online”).
-
Select Save.
-
Select the Credentials tab, select Create credentials, and then select OAuth client ID.
- For Application type, select Web application.
- Leave the Authorized JavaScript origins field blank.
- For Authorized redirect URIs, enter:
<Open edX instance domain>/auth/complete/google-oauth2/.
For example, for devstack, enter:
http://localhost:8000/auth/complete/google-oauth2/. - Select Create to finish creating the credentials.
-
After you obtain the credentials, note the client ID and the client secret.
-
-
Register the Open edX Instance with Facebook
To create the app in the Facebook developer portal, follow these steps.
-
Sign in to Facebook, then go to the Facebook for Developers page.
-
Select Add a New App, and then select Website.
-
Enter a name for the app, and then select Create New Facebook App ID.
-
Enter your information in the rest of the fields in the app creation process.
-
Under Quick Start for Website, select Skip Quick Start. You are now at the developer console page for the new Facebook app.
-
Select Settings, and note the App ID and App Secret.
-
On the Settings page, select Add Platform, and then select Website.
-
For Site URL, enter the URL of your Open edX instance (for example,
<http://localhost:8000/>for devstack). -
In the App Domains field, enter the domain name from this URL (for example,
localhost). -
Select Save Changes.
-
Under Products -> Facebook Login -> Settings -> Authorized redirect URIs, enter:
<Open edX instance domain>/auth/complete/facebook/.
For example, for devstack, enter:
http://localhost:8000/auth/complete/facebook/. -
Select Save Changes.
-
-
Register the Open edX Instance with LinkedIn
To create the LinkedIn app, follow these steps.
-
Go to the LinkedIn Developers page.
-
Click Create Application, enter your information in the form, and then submit the form.
-
On the page that opens with information about the app, note the Client ID and Client Secret.
-
In the OAuth 2.0 section, for Authorized Redirect URL, enter:
<Open edX instance domain>/auth/complete/linkedin-oauth2/.
For example, for devstack, enter:
http://localhost:8000/auth/complete/linkedin-oauth2/. -
Select Update to save your information.
-
-
Add the Provider Configuration
-
Go to
<LMS URI>/admin/third_party_auth/oauth2providerconfig/. For example, on devstack, go tohttp://localhost:8000/admin/third_party_auth/oauth2providerconfig/. -
Select Add Provider Configuration (OAuth).
-
Make sure that Enabled is selected.
-
Make sure that Visible is selected.
-
For Icon Class, enter the appropriate value.
-
For Google, enter
fa-google-plus. -
For Facebook, enter
fa-facebook. -
For LinkedIn, enter
fa-linkedin. -
For Azure, leave the field blank.
-
-
For Name, enter the appropriate value.
-
For Google, enter
Google. -
For Facebook, enter
Facebook. -
For LinkedIn, enter
LinkedIn. -
For Azure, enter
Microsoft.
-
-
For Backend Name, select the appropriate value.
-
For Google, select google-oauth2.
-
For Facebook, select facebook.
-
For LinkedIn, select linkedin-oauth2.
-
For Azure, select azuread-oauth2.
-
Note: If the value does not appear in the list, either the
ENABLE_THIRD_PARTY_AUTHsetting or theTHIRD_PARTY_AUTH_BACKENDSsetting is not configured correctly.-
For Client ID, enter the client ID that you noted earlier.
-
For Client Secret blank. enter the client Secret that you noted earlier.
-
(Optional) If you want Facebook or LinkedIn to provide the user’s email address during registration, enter the following code into Other settings.
-
For Facebook, use this code.
{
    "SCOPE": ["email"],
    "PROFILE_EXTRA_PARAMS": {
        "fields": "id, name, email"
    }
}
For LinkedIn, use this code.
{ "SCOPE": ["r_liteprofile", "r_emailaddress"], "FIELD_SELECTORS":
    ["emailAddress"] }
Select Save.
Users who have an account with the IdP that you have configured can now sign in.
-
Show Header Language Selector
1- Sign in to the LMS Django administration console for your base URL. For example,
http://{your_URL}/admin.2- On the Site Administration page, locate DARK_LANG.
3- In the DARK_LANG section, next to Dark lang configs, select add.
4- On the Add dark lang config page, locate the Released languages field, and then add the following value.
en, ar5- Make sure that Enabled is selected.
6- Select Save.
-
Site Configuration - ECommerce Currency
There are several ecommerce templates where "$" or "USD" is hardcoded:
tutor config save --set "ECOMMERCE_CURRENCY"= Currency ISO Code
EYouth Payment Configurations
EYouth Platform - Payment Reference
Important Links
EYouth OpenedX Platform Technical Reference
Command Line Interface (CLI) - Tutor Local
Command Line Interface (CLI) - Tutor Dev